 |
 |
Step by Step Instructions for
Filling Out the Entry Form & Paying the Fees
- - You
will be requested to pay your Entry Fees before you Submit your
Entry Form. We have found that a few browsers do not support
the Zeffy payment screens, so to test your browser,
before filling out any data on the Form, please click
the Zeffy "Entry Fees" button, and make sure it takes
you to the initial Zeffy screen (see step # 7).
- If you get a screen that looks
like the one in step #7, close that window and proceed with step
#2.
- If you get a blank screen, you
might consider downloading another browser, such as Google Chrome
or Microsoft Edge, then go to www.miniature-art.com under that
browser and test again.
- Or if you so choose, you may pay
your Entry Fees by check and enter your Check # rather than the
Payment Confirmation # at the bottom of page 1 of the Form. Be
sure to include your check in the box containing your artwork.
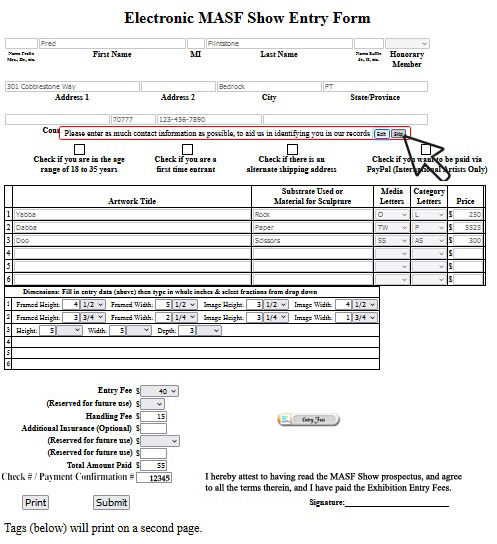
- Most of the fields on this form have
additional information / instructions if you hover the cursor
over the input area.
The next two screen shots are examples. This is what you get
for the Media area:
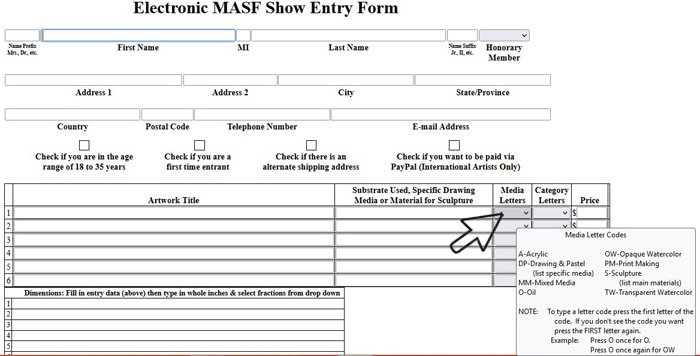
- Hover the cursor over the Category
Letters drop down menu area:

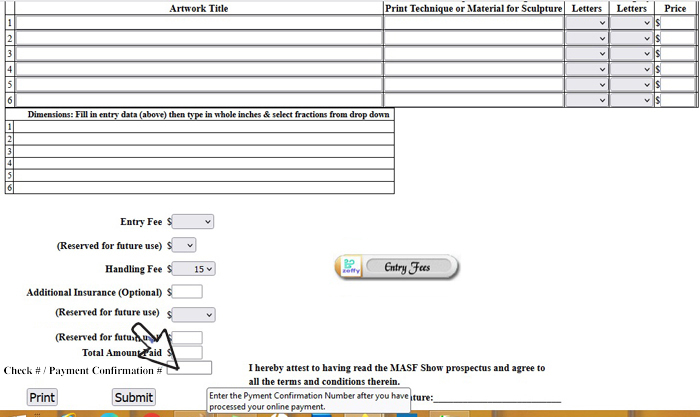
- Hover the cursor over the Check # /
Payment Confirmation # area. The Payment Confirmation #
will be emailed to you after you have completed your online Entry
Fees payment - see "Entry Fees"
button to the right. If you cannot or choose to not use the payment
buttons, your check # goes here:
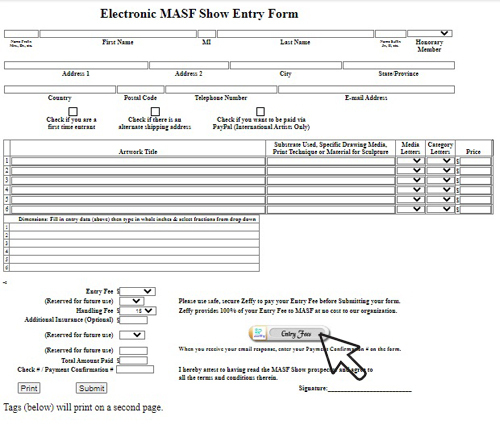
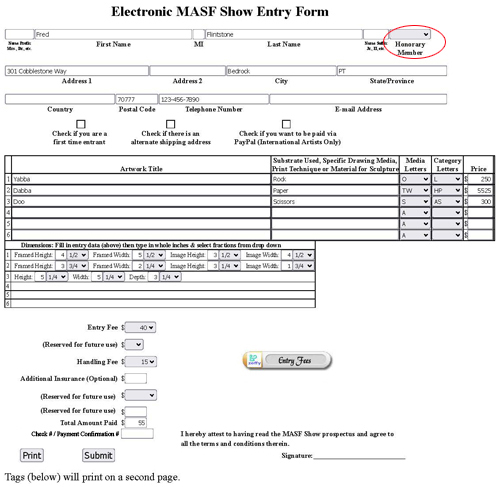
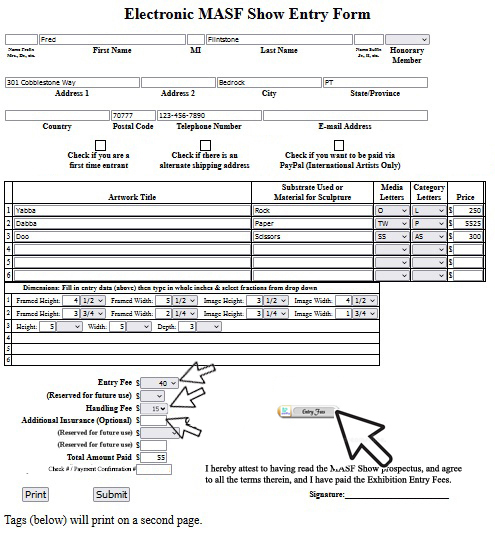
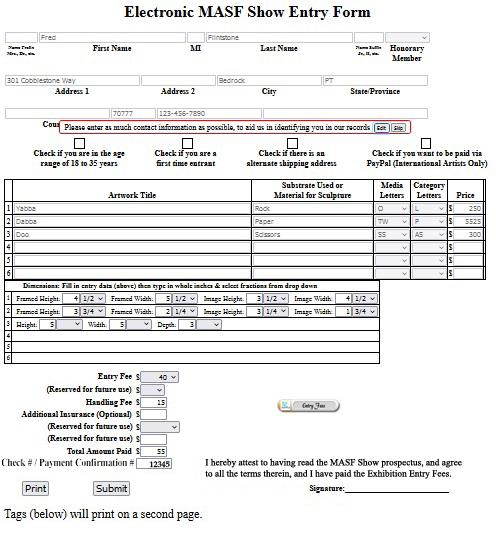
- Fill out the form. If you are a signature
member of MAA and/or RMS, please choose the appropriate letters
from the Honorary Member drop down menu (circled below). Otherwise
your name will appear in the Show Catalog and the Online Show
without this distinction:
- - Choose
the appropriate Entry Fee from the drop down menu, the Handling
Fee if you want to change
it from the default of $15, and optionaly enter any Additional
Insurance.
- Click the Zeffy Entry Fees button,
and you will be taken to a new window for payment.
- If
you cannot or choose not to use the Payment button, skip to step
# 11 and enter your check # rather than the Payment Confirmation
# in the box at the bottom of page 1 of the Entry Form.
- If you are an International
artist and wish to pay via PayPal, skip to step # 11 and enter
"PP" rather than the Payment Confirmation # in the
box at the bottom of page 1 of the Entry Form.
- Add 1 to the appropriate Entry Fee,
Handling Fee (if any) & add 1 or more for Additional Insurance
(if any):

- Click Continue to pay:

- - Type
required information, and click Buy. Then close the Zeffy window,
and you will be back to the Entry Form.
- You see two screen shots here
because we have found that some of the Zeffy screens present
differently depending on what browser you are using. For example,
the left screen is Firefox, and the right screen is Chrome.
- On Chrome's page there is an additional
option to use  to
pay. This method requires you to set up an account with link.com,
and they will save your payment information, so the next time
you use them to make a payment, you do not have to re-enter that
data. You can skip that and enter your credit card or bank information
on this page. to
pay. This method requires you to set up an account with link.com,
and they will save your payment information, so the next time
you use them to make a payment, you do not have to re-enter that
data. You can skip that and enter your credit card or bank information
on this page.
- Please note that you can change the 17% Zeffy contribution
to a greater or lesser amount including $0. Whatever you choose
to do, MASF will still receive 100% of the fees.
- You will receive an email confirmation
from Zeffy which contains a Payment Confirmation Number.
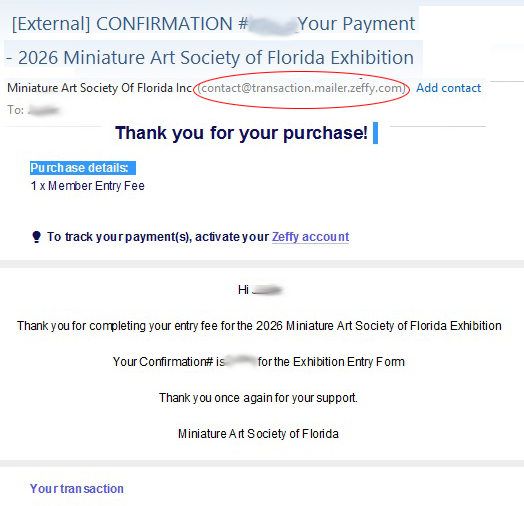
- Type that number into the Payment Confirmation
Number box:
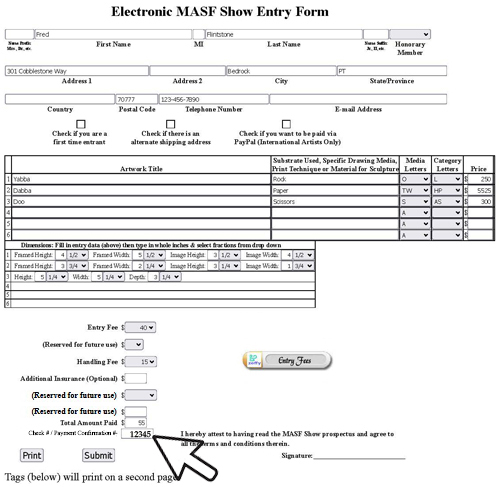
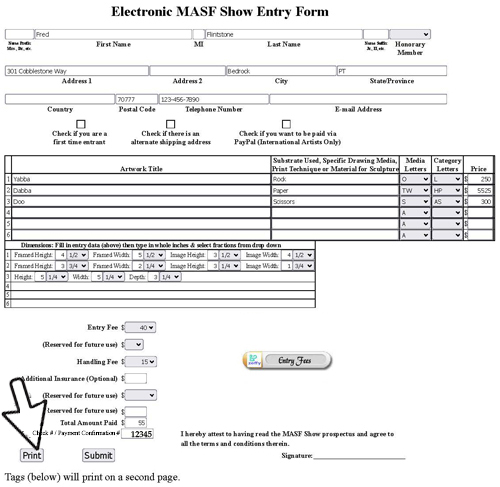
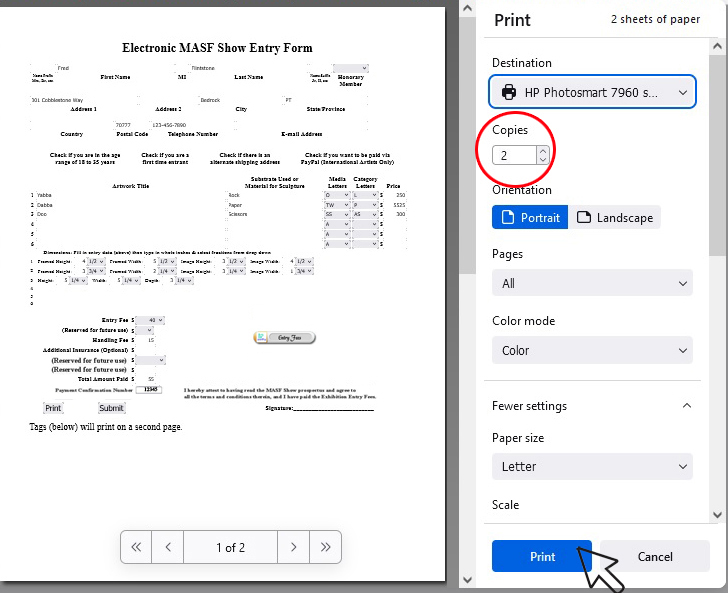
- Click the Print button:
- - The
Print button won't work if there are problems with data on the
Form.
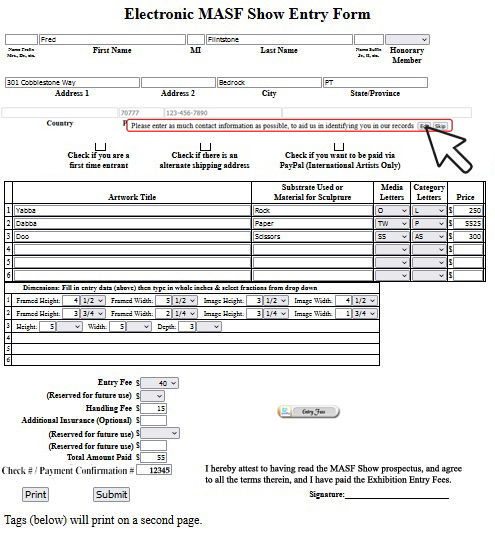
- If there is a Mandatory Field
that was not entered properly, you must Edit it.
- If there is a highly recommended
field that was not entered, you may Edit it or Skip
it.
- In this example, the e-mail address
was omitted.
- The user chooses to Skip the e-mail
address:
- Click the PRINT button (again):
- - This
time the Print button works.
- On the Print dialog menu, change
# of Copies to 2, and Click the Print button in the menu box:
- Click the Submit button:
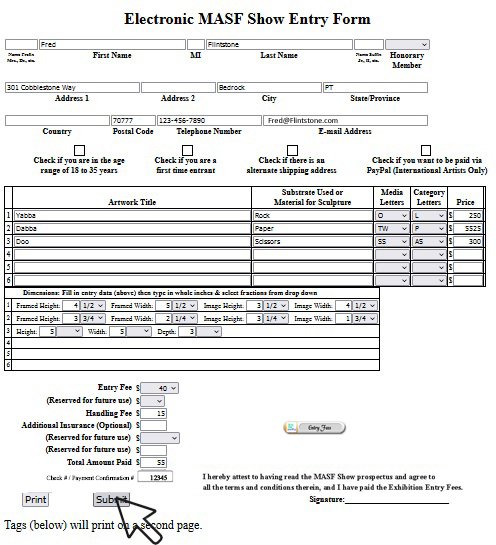
- - Just
like the Print button, the Submit button won't work if there
are still problems with data on the Form.
- Because the user chose to Skip
this warning previously, the warning message appears again.
- Either click Edit and fill
in your e-mail address, or click Skip again. This user
clicks Edit:
- Fill in the missing information:
 . .
- Click the Submit button again:
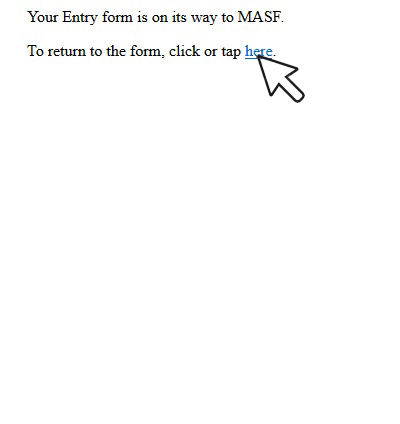
- - This
acknowledgement message appears if your form was successfully
submitted.
- Click the here link to return
to the form one more time:
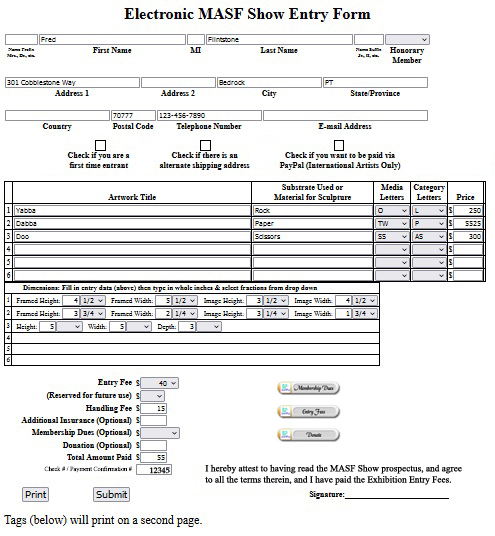
- - Pages
1 and 2 of the form are still filled in, and you may print it
again or save it to a PDF file (an option on the print dialog
menu under Destination).
- Close the window if you are satisfied.
- DO NOT CLICK SUBMIT A SECOND TIME.
|
|
|

